

In previous metallurgy posts, I experimented with the concept of making molds by using wooden models to stamp a shape into mud. So far, the best success that I have had was with my cube model, which is mostly due to the fact that the cube didn’t need to be perfect, since I could simply cut and sand the cube into shape from the rough, cuboid blob.
While I have been slowly improving on the cube approach, I decided that I should attempt to make a more complex shape using this stamp method. Knowing me, what shape do you think I would choose? Of course I must make an American flag shape!
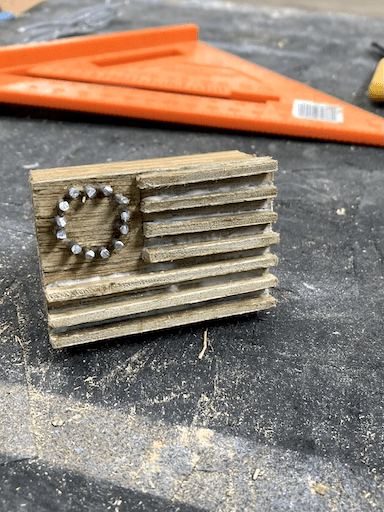
The Betsy Ross Stamp
I figured that the 50 star US flag would be too complex for my small scale model, so I needed to simplify it. Well, the best way to simplify the field of the flag is to reduce the number of stars, and I estimated that 13 was about the appropriate number of stars — all right, it was mostly because I have always wanted to own a Betsy Ross flag.
Come to think of it, my Betsy Ross Stamp could be viewed as having an ironic association to the Betsy Ross flag and the Stamp Act from the Revolutionary War; this just might be an unintentional in-your-face gesture to King George III.
Making the Stamp
To make the stamp, I simply found a thin board and cut it to the 10 by 19 dimension of the flag, then I cut 7 boards — 3 equal to the length of the flag and 4 equal to the length of the flag minus the length of the field — to make a deeper imprint for the red stripes, and, finally, I drilled 13 holes into the field in a circular shape and wedged 13 segments of aluminum wire for the stars; at this scale, a cylindrical segment of wire was sufficient because cutting the segments into a star prism would be nearly impossible.
To make the stamp usable, I cut a block of wood into the same, 10 by 19 dimension and then I attached a handle. I glued my flag-shaped board onto the block, which finally completed the stamp.
Using the Stamp
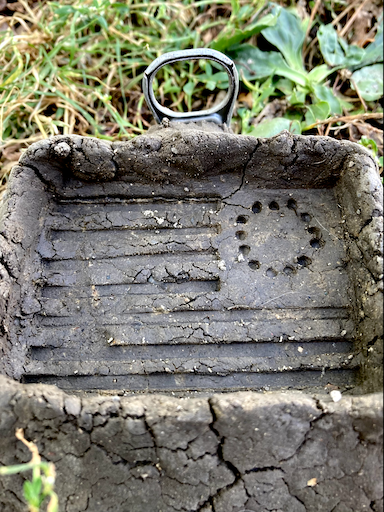
I stamped my model into mud — technically, I formed mud around the model, because the stamp is large enough to cause the small heap of mud to crumble — and I poured molten aluminum into the mold. I tried this on two different occasions, but only ever had partial successes. My first mistake was that I didn’t have enough metal, and my second was that I didn’t dry the mud mold enough.
Do not try this if you don’t know what you are doing and if you don’t use safety gear. For this final cast, I had almost a quarter pound of molten aluminum in a wet mold, and if the mold had been a little wetter, it could have exploded and launched sticky, molten aluminum everywhere. I actually evacuated the area once I poured the metal, in case this did happen.
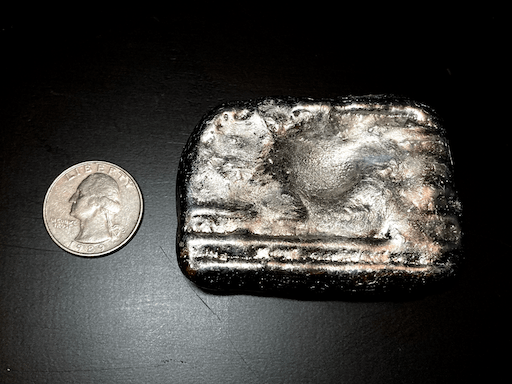
My second cast was technically the closest to a complete success, but because the mold wasn’t completely dry, some water boiled in the mold and formed a steam bubble in the center of my flag. This is quite frustrating, but I am still happy with the results. I think I will wait for warmer weather next summer so that I can leave the mold in the sun to allow it to dry completely, then I will see if I can make a more perfect Betsy Ross flag.
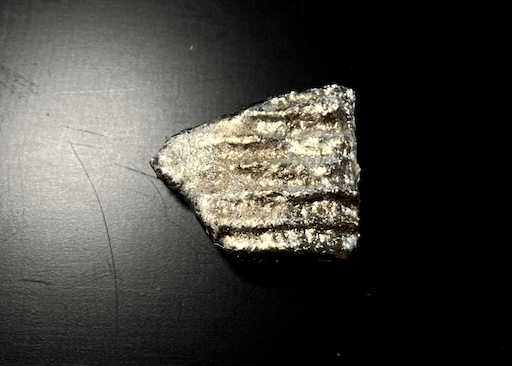
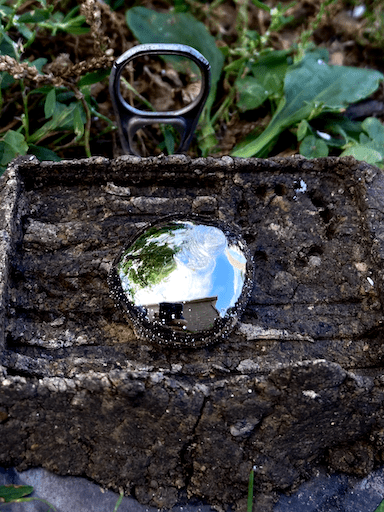
Even though I have melted aluminum dozens of times by now, I am still impressed by the perfectly reflective surface on aluminum immediately after being poured. Here is a bonus image so that you can appreciate this liquid mirror with me.
What do you think about my makeshift mold?
